Fill out the form to find out how easy it is to get started with eMerchantClub
Want to get started?
Enter your information below!
Thank you! Your request for more information has been received. We will be in touch soon!
Start today in three steps
Ready to kickstart your journey? Taking the first step is a breeze! Simply give us a ring and one of our friendly representatives, based right here in the U.S., will guide you through the process.
1. We build it
We’ll build your professional e-commerce website on the leading platform in just 48 business hours. Get ready to launch your online business and start thriving!
Rev up your business with our electrifying e-commerce websites! We handle the heavy lifting, so you can sit back and enjoy the ride. Picture your dream online store brought to life in a jaw-dropping design that leaves customers awestruck. No more wasting time and energy; let us create an irresistible shopping experience that propels your business to new heights. Buckle up and ignite your e-commerce dreams today!
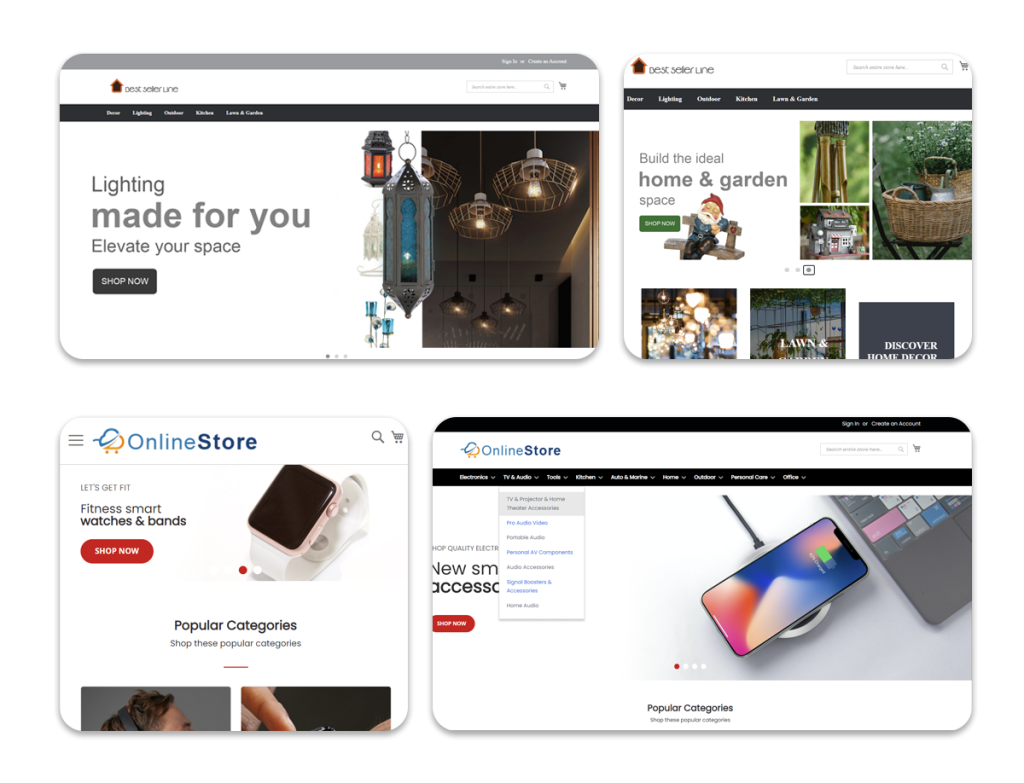
These website examples are representative of what you can expect from eMerchantClub. Your website template is dependent upon your purchase.
Nominated for 2022 & 2023 BBB Torch Awards
The BBB Torch Award for Ethics is a prestigious award given by the Better Business Bureau to recognize businesses that demonstrate the highest standards of ethical behavior and social responsibility. The award is presented to businesses that go above and beyond in their efforts to build trust and integrity with customers, employees, and the community.
Being nominated for the BBB Torch Award for Ethics for two years in a row is a significant accomplishment that reflects our companies unwavering commitment to ethical business practices. It is a testament to our dedication to honesty, transparency, and fairness in all our business dealings, and it sets us apart as a leader in the industry.